How to use sample merge in p:IGI+ v3
Running Sample merge in p:IGI+ ensures that all samples are merged consistently.
It is recommended that Sample merge is undertaken when:
- new data are added to a project and those samples are assigned to existing, previously merged sites.
If new sites are being added to a project alongside the new samples, if may be more appropriate to run Project merge.
For further instructions see:
How to use project merge in p:IGI+ v3
How to use site merge in p:IGI+ v3
How to migrate a p:IGI+ v2 project to p:IGI+ v3.0
Sample merge
Step 1: Open Sample merge
1. Go to data à Sample merge…

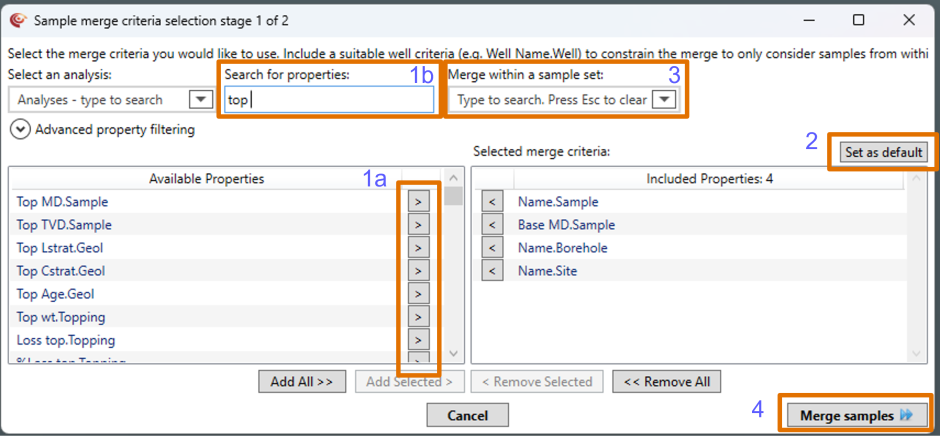
Step 2: Select criteria for sample merge
- Choose properties to use for the sample merge criteria by either:
a. Selecting properties from the Available Properties list, or
b. Searching in the Search for properties box and adding them to the selection.
Note: Default sample merge criteria are provided. Remove them using:
- <Remove Selected
- <<Remove All
2. Optional: Select Set as default to use these criteria for any future sample merges.
3. Optional: Choose Merge within a sample set if you wish to merge against a filtered sub-set.
4. Select Merge samples.
Step 3: Resolve conflicts for sample merge
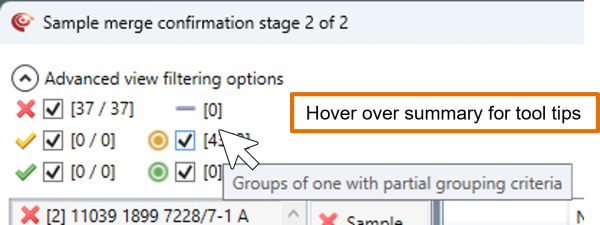
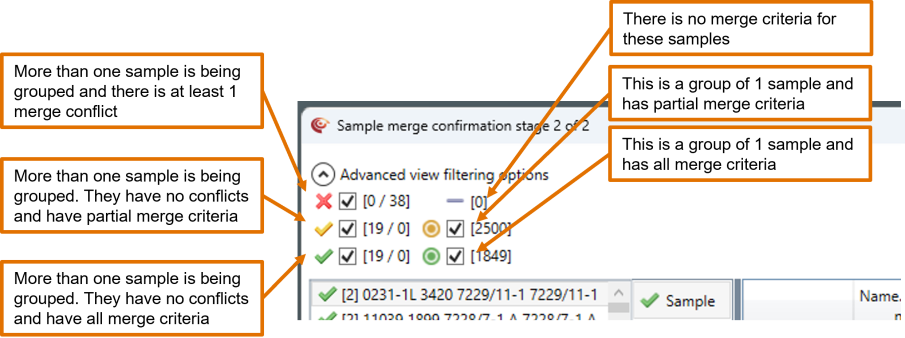
The Sample merge confirmation stage 2 of 2 window displays proposed sample groupings.
- Proposed sample groupings appear on the left.
- Details for the proposed sample groupings appear on the right.
Status icons beside each indicate how it will be grouped. Hover over the summary icons for tool tips.
If many conflicts occur, consider refining the merge criteria (bottom left button).
1. Resolve conflicts using one, or a combination, of the following methods:
Option 1: Resolve conflicts manually
a. Select a candidate sample with conflicts.
b. Select Next conflict >>.
c. Choose the correct value using the tick boxes.
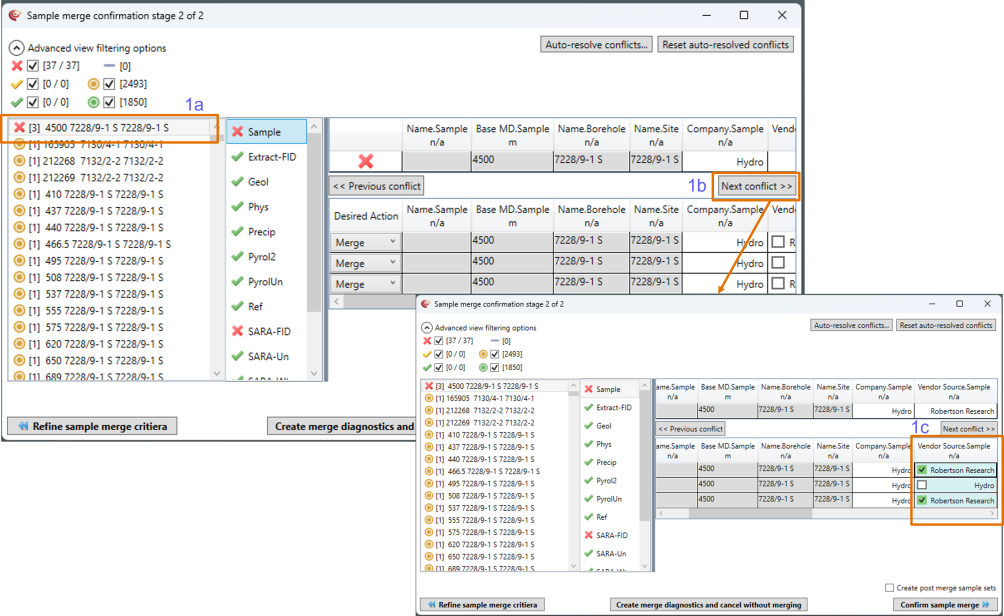
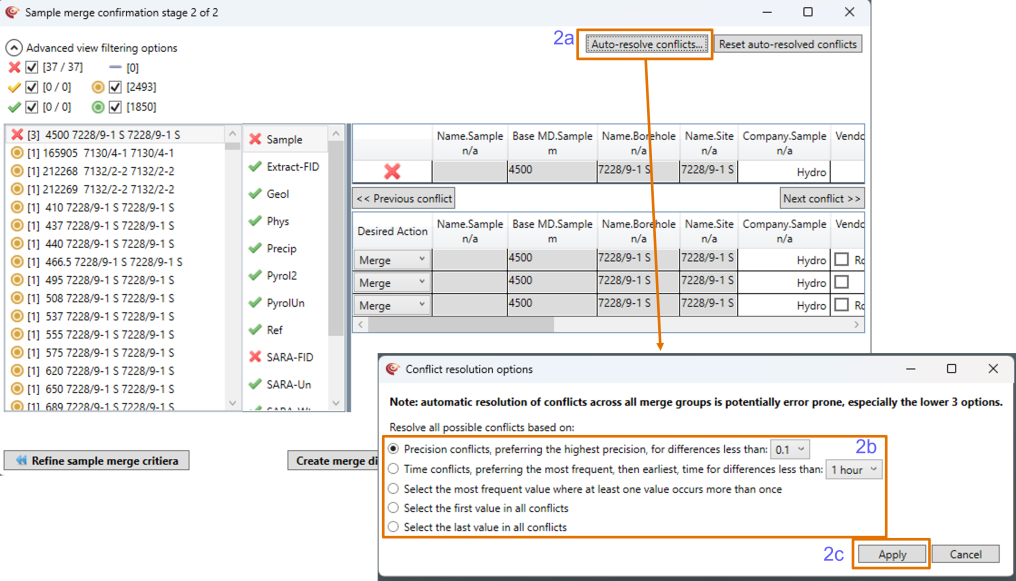
Option 2: Auto-resolve conflicts
a. Select Auto-resolve conflicts…
b. Choose the required conflict resolution
c. Select Apply
Note: Auto-resolution applies to all conflicts, not just the selected item. Use Reset auto-resolved conflicts to undo these changes.
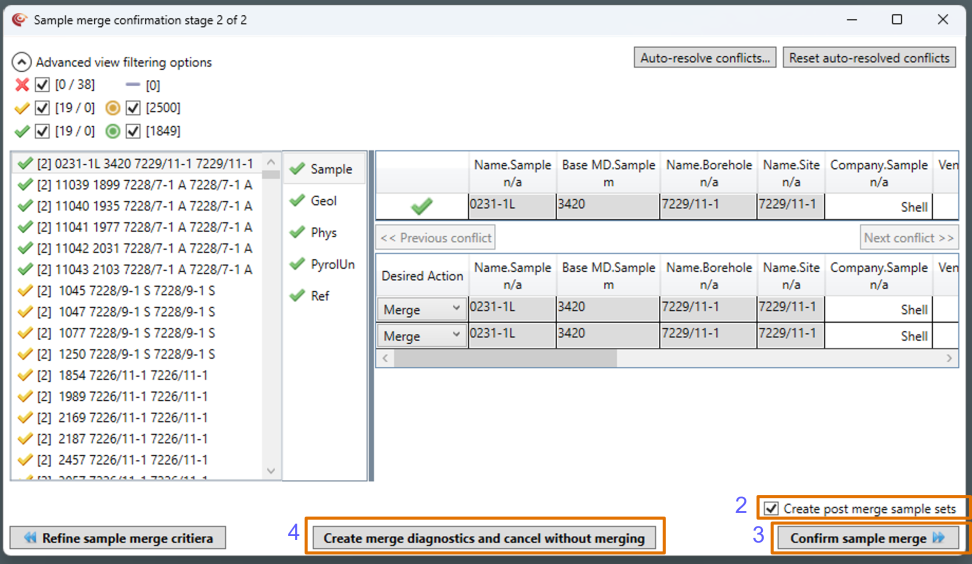
2. If all conflicts are resolved satisfactorily, you may wish to select Create post merge sample sets.
If selected, a folder named Post merge sample sets at dd/mm/yyyy hh/mm is created in the artefact manager upon confirmation of sample merge.
The folder contains the following static sample sets:
- Samples that merged at dd/mm/yyyy hh/mm,
- Single samples that merged at dd/mm/yyyy hh/mm,
- Samples that merged with partial criteria at dd/mm/yyyy hh/mm, and
- Single sample that merged with partial criteria at dd/mm/yyyy hh/mm
Note: If all conflicts are not resolved, an additional static sample set named Samples with conflicts at dd/mm/yyyy hh/mm will be created.
3. Click Confirm sample merge.

Optional: To review data before committing to the merges:
4. Select Create merge diagnostics and cancel without merging.
This will:
· Cancel the merge
· Close the merge window
· Create a folder named
Merge diagnostics at dd/mm/yyyy hh/mm
This folder contains:
- A page displaying samples with merge conflicts
- Four sample sets identical to those created by Create post merge sample sets
- These can be used to review the data within the project before running the merge again.

Sample merge complete
The sample merge is considered complete once sample merges have been confirmed.
© 2026 Integrated Geochemical Interpretation Ltd. All rights reserved.