How to use the Data QC Tool in p:IGI+ v3
The Data QC Tool is used to define depth datums, identify sites and perform validation checks within a p:IGI+ project.
It is recommended to run the tool after merging (via project-, site- or sample- merge) in the following situations:
- When migrating a p:IGI+ v2 file to p:IGI+ v3
- When importing new data into existing p:IGI+ v3 projects
For further guidance, refer to the following how-to guides:
- How to use Project merge in p:IGI+ v3
- How to use Site merge in p:IGI+ v3
- How to use Sample merge in p:IGI+ v3
- How to migrate a p:IGI+ v2 project to v3
Using Data QC Tool
Step 1: Opening Data QC Tool
- Select Data à Data QC tool
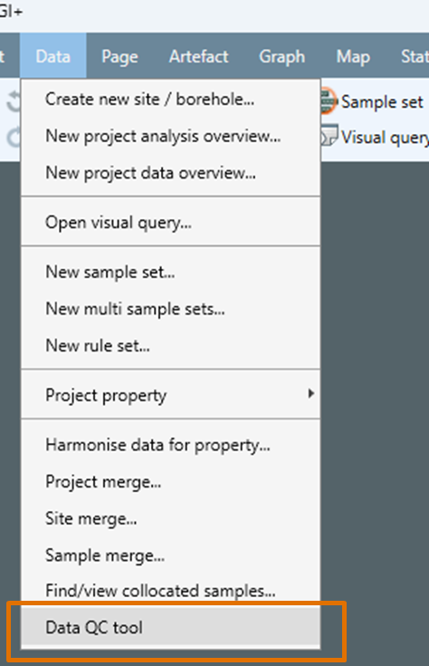
This will open the Data QC Tool window.
2. If required, choose a sample set to apply the tool to.
Note: It is recommended that the Data QC tool is run on the entire project when first opening a v2 project in v3. Apply it to individual sample sets only when adding new data to an existing v3 project.
3. Select or deselect tick boxes to choose which rules to apply.
Note: Use the default parameters unless they are not suitable.
Rules include:
a. Defining required datums
b. Assigning site names from Location.Site or Name.Borehole
c. Assigning site or sample latitude/longitude where available
d. Flagging potential depth data issues
4. If changes are made to the default rules, select Set as defaults to retain these for future data QC within the project.
5. Select Apply.
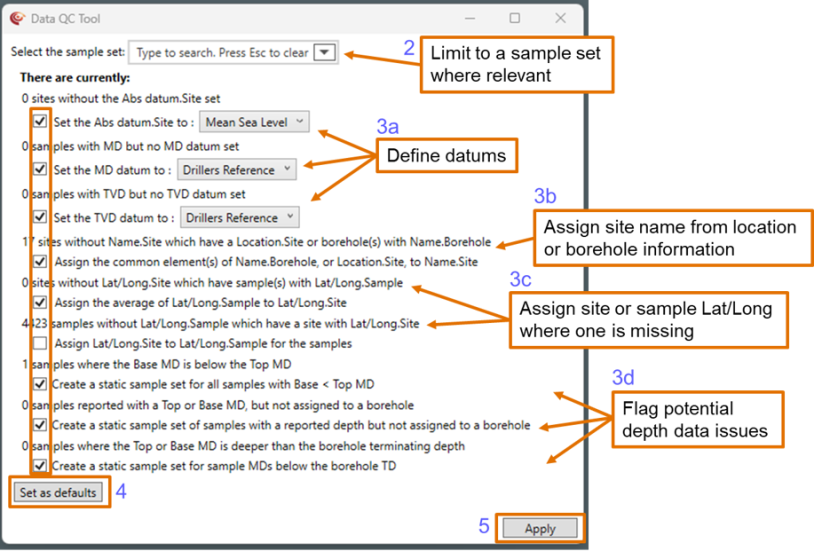 Once applied, the selected QC rules will take effect within the project.
Data QC Tool complete
The Data QC Tool workflow is considered complete once the QC rules have been applied.
© 2026 Integrated Geochemical Interpretation Ltd. All rights reserved.